Showing posts with label Free Pattern. Show all posts

April 8, 2020

Willbe O'key, my optimistic amigurumi friend

As soon as I knew about the initiatives  #andratuttobene and #desdemiventana (consisting on hanging banners from your windows and balconies, with rainbows  painted by the little ones) I knew I had to make a rainbow amigurumi. Actually I needed it. Come on, rainbows, colours and positive vibes? Oh please, baby.

En cuanto supe de las iniciativas #andratuttobene y #desdemiventana consistentes en colgar de los balcones pancartas con arcoiris pintadas por niños, tuve claro que quería hacer un amigurumi de un arcoiris. Más que querer era casi una necesidad. ¿Arcoiris, colorines, sentimientos positivos y mensajes optimistas? Oh si, baby.


It started as a kind of therapy. I thought it would be good for me to work on an optimistic and colorful project during the first days of this crazy situation. Something that would cheer me up  and hopefully would help to cheer other people up as well.

However, for a moment, it turned out to be the other way around. I wasn't able to get the result I was looking for, I had to start it all over again like 15 times and I even had to leave the project on standby for a while. And then I understood that Willbe O'key is nothing but a metaphore of these times we're living. The intention is good, positive, full of love. But the fact is that it's not always easy to stay positive, and is inevitable to have our moods.

But, you know what? A few days later I got it and just the way I wanted it. It was unusually difficult, it had never happened to me before, but as a result of this we have an easy peasy amigurumi and quite quick to crochet, that I wish it will cheer your day up a little bit.

Todo empezó casi como una terapia, pensé que me vendría bien en esos primeros días de locura, centrarme en un muñeco alegre, con mensaje optimista, que me animase y ayudase a animarse a otras personas.

Sin embargo por un momento se convirtió casi en todo o contrario. No conseguía el resultado que quería, tuve que repetirlo por lo menos 15 veces y hasta dejarlo aparcado por días ya que me estaba generando más ansiedad que alivio. Y es que Willbe O'key no es ni más ni menos que una metáfora de esta situación. La intención es alegre, positiva, llena de amor. La realidad es que no siempre se consigue y hay momentos malos por los que es inevitable pasar.

Pero, ¿sabéis qué? Que al final lo conseguí, y me quedó justo como quería. Fue extraordinariamente complicado sacarlo, nunca me había ocurrido esto con un amigurumi,  pero el resultado es un muñeco super sencillo y bastante rápido de realizar que, espero, alegrará un poco vuestro día.


MATERIALS
- Katia Fair Cotton in different colours. Pistachio 34, red 4, light pink 13, night blue 24, mint green 17, pearl light grey 11, black 2.
- 2mm crochet hook
- Stitch markers
- Tapestry needle and pins
- Pollyfill stuffing
- Pipecleaners

MATERIALES
- Katia Fair Cotton en los colores pistacho 34, rojo 4, rosa claro 13, azul noche 24, verde menta 17, gris claro perlado 11, negro 2.
- Aguja de ganchillo de 2 mm
- Marcadores
- Aguja lanera y alfileres
- Relleno
- Limpiapipas


BODY
Willbe's body is a very long oval folded.


How to crochet an oval?

We start crocheting the foundation round.

1. Using yellow cotton yarn, chain 63.
2. 61 sc (place a marker in the first sc), 3 sc in the last chain. (Place a marker in the first and third sc)
Keep crocheting along the other side of the chain, 60 sc, 2 sc where the first marker is and place a marker in the first of this last 2 sc you've just made.

Now your base is divided into 4 sections, two sections of 60 sc that will remain  unalterable round after round, and 2 sections of 3 sc that you'll increase proportionally in each round.

Therefore, where you now have 3 sc in the next round you'll have 6, in the next 9, 12, 15... and so on.


Remember how the proportional increasing works.


¿Cómo tejer un óvalo?

Empezamos tejiendo la base:

1. Con amarillo, 63 cadenetas.
2. 61 pb (poner un marcador en el primer pb), 3 pb en la última cad. (Poner un marcador en el primer y tercer pb)
Seguir tejiendo por el otro lado de la cad, 60 pb, 2 pb donde está el primer marcador, poner un marcador en el primero de estos 2 pb.

Ahora mismo la base está dividida en 4 secciones, dos de 60 pb que se mantendrán inalterables vuelta tras vuelta y dos de 3 pb que irán aumentando proporcionalmente 3 pb en cada vuelta.

Por lo tanto, donde ahora hay 3 pb en la siguiente habrá 6, en la siguiente 9, 12, 15, y así sucesivamente.


Recordemos cómo funciona el aumento proporcional.

CUERPO
El cuerpo de Willbe es ni más ni menos que un óvalo muy alargado doblado por la mitad.

¿Cómo tejer un óvalo?

Empezamos tejiendo la base:

1. Con amarillo, 63 cadenetas.
2. 61 pb (poner un marcador en el primer pb), 3 pb en la última cad. (Poner un marcador en el primer y tercer pb)
Seguir tejiendo por el otro lado de la cad, 60 pb, 2 pb donde está el primer marcador, poner un marcador en el primero de estos 2 pb.

Ahora mismo la base está dividida en 4 secciones, dos de 60 pb que se mantendrán inalterables vuelta tras vuelta y dos de 3pb que irán aumentando proporcionalmente 3 pb en cada vuelta.

Por lo tanto, donde ahora tienes 3 pb en la siguiente tendrás 6, en la siguiente 9, 12, 15, y así sucesivamente.

Recordemos cómo funciona el aumento proporcional.


This is how you should work the sections between markers:
1. 3 sc in the same stitch
2. 3 inc ( 6 sc)
3. (1 sc, 1 inc) x3 = 9 sc
4. (2 sc, 1 inc) x3 = 12 sc
5. (3 sc, 1 inc) x3 = 15 sc
6. (4 sc, 1 inc) x3 = 18 sc... 

Keep increasing until you reach the desired size. (You can redistribute the increasings in order to avoid the "corner effect")

Así quedarán las secciones entre marcadores:
1. 3 pb en el mismo pb
2. 3 aum (6 pb)
3. (1 pb, 1 aum) x3 = 9 pb
4. (2 pb,  1 aum) x3 = 12 pb
5. (3 pb, 1 aum) x3 = 15 pb
6. (4 pb, 1 aum) x3 = 18 pb...

Y así hasta alcanzar el tamaño deseado. (Se pueden distribuir los aumentos para evitar el efecto esquina.)


In this case we'll crochet 20 rounds, changing the colour every 4 rounds in this order: yellow, red, pink, blue, green. (I've used another marker to know when to  change the colour)


Use as many colours and crochet as many rounds as you like.

Once you've finished your oval, fold it as if it were a taco, but inside out, and start sewing the edges leaving 5 or 6 cm open. Stuff it and finish sewing it.

En este caso llegaremos a las 20 vueltas, cambiando de color cada 4 en este orden: amarillo, rojo, rosa, azul, verde. (Yo también he usado otro marcador para saber cuándo cambiar de color)

Usar tantos colores y hacer tantas vueltas como se quiera.

Una vez terminado el óvalo, doblar por la mitad, como si se tratase de un taco, pero con la parte del derecho hacia dentro.

Coser por el lateral hasta dejar unos 5 o 6 cm y dar la vuelta a la pieza, de dentro hacia afuera.
Rellenar y terminar de coser.


IDEA! TRY CROCHETING THE BODY WITH A BULKY YARN AND YOU'LL HAVE A NICE PILLOW TO DECORATE YOUR SOFA OR YOUR BED.

EYES
1. Using black cotton yarn, 6 sc
2. 6 inc (12 sc)
3. (1 sc, 1 inc) x6 = 18 sc
4. Using white cotton yarn, (2 sc, 1 inc) x6 = 24 sc
5 to 8. 24 sc
Stuff the eyes and attach them to the face.

¡IDEA! TEJE ESTE MISMO CUERPO CON UNOS HILOS Y AGUJA MÁS GORDOS Y TENDRÁS UN COJÍN IDEAL PARA DECORAR TU SOFÁ O TU CAMA.

OJOS
1. Con negro, 6 pb
2. 6 aum (12 pb)
3. (1 pb, 1 aum) x6 = 18 pb
4. Con blanco, (2 pb, 1 aum) x6 = 24 pb
5 a 8. 24 pb
Rellenar los ojos y coser a la cara.


LEGS
1. Using black cotton yarn, 6 sc
2. 6 inc (12 sc)
3 and 4. 12 sc
5 to 32. 12 sc. Alternate white and black every 2 rounds. Crochet only with white from round 20 to the end. (12 rounds from the last black round)
Stuff the legs and attach them to the base of the body.

PIERNAS
1. Con negro, 6 pb
2. 6 aum (12 pb)
3 y 4. 12 pb
5 a 32. 12 pb. Alternar el blanco y el negro cada dos vtas. Tejer todo en blanco desde la vta 20 hasta el final. (12 vtas después de la última negra)
Rellenar las piernas y coser a la base del cuerpo.


ARMS
1. Using white cotton yarn, 5 sc
2. 5 inc (10 sc)
3 and 4. 10 sc
5. 1 puff stitch, 9 sc
6. 10 sc
7. 1 dec, 8 sc (9 sc)
8 to 22. 9 sc
If you are using pipe cleaners, insert them now.
Attach them to the base of the body, next to the legs.

BRAZOS
1. Con blanco, 5 pb
2. 5 aum (10 pb)
3 y 4. 10 pb
5. 1 punto de avellana, 9 pb
6. 10 pb
7. 1 dism, 8 pb (9 pb)
8 a 22. 9 pb
Si se usan limpiapipas, es el momento de introducirlos en los brazos.
Coser en la base del cuerpo, junto a las piernas.


SMILE
1. Using black cotton yarn, chain 18 
2. 17 sl st
Attach the smile onto the face

SONRISA
1. Con negro, 18 cad
2. 17 pr
Coser la sonrisa a la cara.


STAY AT HOME WITH WILLBE. You can hug him when you're feeling down. Just look at his cute face and try to imitate his smile.

QUÉDTE EN CASA, CON WILLBE. Abrazadlo si os sentís mal. Mirad su carita y dejad que sea su sonrisa la que os contagie. 

February 9, 2020

Purse crochet cover

Do you know this feeling, when you suddenty have the urge of finishing all your UFOS? Of course you know it, we all know it. As well as we know that this feeling just lasts a few days, maybe weeks. Make it a month, maybe two if you're very well determined... but I seriously doubt it lasts more than that.

Well, this is what I'm experiencing right know. All my yarn boxes and project bags are a mess but I'm feeling so Marie Kondo that I'm trying to fix that mess. Will I make it? Don't think so, but at least I'll try.

El espíritu del orden y la organización se ha apoderado de mí. No hice propósitos de año nuevo, hice propósitos de vida nueva y estos conllevan organizar el caos lanero y terminar todo lo que tengo a medias. ¿Os suena esto de algo? 

Laura Algarra lleva un tiempo ayudándonos con su "dieta de ovillos" por lo que yo he empezado a poner en práctica mis patrones de aprovechamiento, terminando proyectos pendientes con los restos de lanas que rondan por mi casa. ¿Lo conseguiré? Pues no creo, pero por lo menos durará unas semanas y algo haremos.


So in one of those little bags full of don't-know-exactly-what I found 2 ugly old purses that I bought a few years ago pretending to cover them with cute tapestry crochet. And today, my ladies, the day has arrived. No more wondering-around is allowed. Open all your drawers and bags and look for an old purse that could need a make over.

Haciendo orden encontré unas viejas carteras que conservaba con la intención de forrarlas y darles una nueva vida, mucho más chic y glamourosa. Hacía ya más de 2 años que estaban guardadas... "Ay, tengo que hacer esto. Ay, tengo que terminar aquello" Así todo el día. Se acabó. Ha llegado el momento. Los monederos se hacen hoy. Así que ponte a buscar por tu casa antiguos neceseres, monederos, carteritas... y ¡manos a la obra!


WHAT WILL YOU NEED?
- A purse
- Cotton yarn scraps (I've used Scheepjes 8)
- Crochet hook (If you're crochetting tapestry try with a smaller hook than recommended, I'm using 2mm)
- Tapestry needle
- Sewing thread and needle
- A nice and sweet afternoon snack and a hot beverage just to make the whole experience even better.

¿QUÉ NECESITARÁS?
- Monedero
- Restos de algodón (Yo he usado restos de Scheepjes 8)
- Aguja adecuada para  el material que hayas escogido. (Si vas a hacer tapestry, mejor usa una aguja medio punto o un punto menos a la indicada, yo he usado una de 2mm)
- Aguja lanera
- Aguja e hilo de coser
- Merienda rica para hacer la experiencia aún más perfecta.


Picnic pattern:
The foundation chain should be multiple of 8 and it has to be as long as twice the base of the purse. In my purse I needed 32 chains to reach the lenght of the purse, so my foundation chain is 64. It's better to make it a little larger than the purse, 1 or 2cm, because the tapestry tends to stretch too much.
Now add 1 more chain.

Para el estampado Picnic:
Teje una cadeneta múltiplo de 8 igual de larga que el doble de la base del monedero. En mi caso con 32 cadenetas alcanzaba la longitud de la base del monedero por lo que hice 64. Es recomendable que sea por lo menos 1 o 2 cm mayor que el monedero, ya que al tejer en tapestry se encoje mucho.
Ahora añade una cadeneta más.

First thing to know about tapestry crochet is how to change colour: You should close the last stitch always with the new colour. That's to say, as you can see in the picture, if you're working with the pink thread, close the last stitch with the brown thread, and then keep working with brown.
Tapestry crochet is always worked with two or more colours, but instead of fasten them off each time you change, you have to keep carrying them, hidden inside the single stitches. Even when you change rows.

La técnica de Tapestry permite crear dibujos combinando diferentes colores en una misma fila. Para ello interpretamos cada punto como si fuese un píxel o uno de los cuadraditos en un papel cuadriculado. Es importante tener en cuenta que el cambio de color se hace cerrando el último punto de un color con el siguiente color a usar. En el ejemplo vemos como vamos a cambiar de blanco a turquesa por lo que el último punto en blanco lo cerramos ya con turquesa. El color que no se está usando irá siempre metido entre los puntos, es decir, se teje envolviendo la hebra.
This pattern combines 4 row blocks, alternating 4 white stitches and 4 turquoise stitches or 4 turquoise stitches and 4 navy blue stitches. Switch colors every 4 rows, as you can see on the picture below, until you reach the purse heigth. Remember always to start the rows with 1 chain.
Now you can embroider some flowers.

Este estampado combina bloques de 4 filas, alternando 4 puntos blancos con 4 puntos turquesa o 4 puntos turquesa con 4 puntos azul marino. Ve cambiando cada 4 filas, según muestra la foto, hasta alcanzar la altura del monedero. Recuerda siempre empezar las filas tejiendo una cadeneta.
Ahora puedes bordar unas florecitas si te apetece darle más aspecto primaveral. Son unos puntos muy básicos de bordado, ¡anímate a probarlo!


Once your piece is finished, fastened off and embroidered, fold in half and using the tapestry needle sew the base and the side, forming a small bag.

Una vez terminado, rematado y bordado tu rectángulo, dóblalo por la mitad y con la aguja lanera cose el lateral y la base formando un saquito.


Insert now the purse inside the little crochet bag you've formed and using the sewing needle and thread, sew it to the zipper.

A continuación mete el monedero en el saquito de ganchillo y con el hilo y aguja de coser cose todo el borde a la cremallera. Como ves, no puede ser más fácil.


For the other version of gingham, your foundation chain should be multiple of 10. Switch every 5 rows and make blocks of 5 stitches. As you can see there are blocks mixing red and navy blue. Just make one stitch in each color and make it the other way around in the next row.

Esta otra variante de cuadros de vichy está hecha con una cadeneta base de múltiplos de 10. En este caso los cadraditos son de 5 puntos en lugar de 4, y en los cuadrados en los que se mezcla el azul con el rojo se teje un punto de cada color, alternando en cada fila. Cambiamos cada 5 filas. Sigue el esquema que ves en la foto, es muy sencillo.


Try all kind of patterns and combinations of squares and rows. Gingham combinations are endless and always beautiful. And tapestry crochet offers an excellent finishing.

Prueba todo tipo de estampados y combinaciones de cuadros y filas. El vichy es infinito y siempre precioso y la técnica de tapestry crochet nos permite imitarlo y conseguir muy buenos resultados.


Now that you're an expert you can step up a level and try your new skills making this super easy amigurumi, Picnic Cat. It's also a very nice project in order to finish scraps of yarn that you have at home, since you can use any size of hook, any kind of thread. It'll always look good.


Y si te has quedado con ganas de practicar el estampado Picnic, puedes continuar con el Gato Picnic, también genial para acabar con restos de algodones que tengas por casa ya que lo puedes tejer en cualquier tamaño y con cualquier material. ¡Siempre queda bonito!. Encontrarás el patrón aquí (también incluye los banderines) y está disponible en español, inglés, francés, italiano, alemán y holandés.

June 11, 2019

Cuteness Undercover, FACE ON A PLATE

For two weeks you've had all the pieces already crocheted and your mind is about to explode trying to solve the mistery. Wondering what the **** have you been doing all this months? Well, you've been crocheting nothing but a super cute Face on a Plate. How cool is that? And almost without noticing it you've learnt how to crochet eyes, noses, ears, legs and arms. Be honest, had you figured it out already?

CREATING FACE ON A PLATE

First, place the eyes on the plate, try different places till you find the one that suits the best. Make sure that all the threads are fastened off and put a bit of stuffing inside the eye. Put a little bit of glue or silicone on the edge, towards the interior, (just a bit!) and stick it to the plate. Be extremely careful not to put too much glue because it could overflow and it would look untidy. (Find here how to crochet the eyes)

Lleváis dos semanas jugando con todas las piezas, estrujándoos el cerebro para averiguar qué diablos estáis tejiendo en estos dos últimos meses. Pues estáis tejiendo nada más y nada menos que a Caraplato.  Y, casi sin darte ni cuenta has aprendido a tejer ojos, orejas, nariz y piernas. Dime la verdad, ¿ya te lo habías imaginado?

CREANDO A CARAPLATO

Primero coloca los ojos en el plato, prueba diferentes lugares hasta que encuentres el que más te gusta. Asegúrate de que todos los hilos están rematados y pon un poquitín de relleno dentro. Pon un poco de pegamento o silicona  (¡ sólo un poco!) en los bordes, más bien cerca del interior y pégalo al plato. Hazlo con mucho cuidado para que no rebose por los bordes, que quedaría feo. (Encuentra aquí cómo tejer los ojos)


Stuff the nose and repeat the same procedure as in the eyes. (Find here how to crochet the nose)

Rellena la nariz y repite el mismo procedimiento que con los ojos. (Encuentra aquí cómo tejer la nariz)


Same thing with the ears, but this time from behind the plate, instead of on it. Don't stuff them but flatten them. Same as you've done with the eyes, try different positions. (Find here how to crochet the ears)

Haz lo mismo con las orejas, pero por la parte de atrás del plato, sin rellenar y aplastándolas. Al igual que has hecho con los ojos, colócalas antes en diferentes posiciones hasta que encuentres la que más te gusta. (Encuentra aquí cómo tejer las orejas)


It's turn now for the damn tubes. Do you want them to be legs? Let's make them legs. Would you prefer them to be arms? Let them be arms then! Hi Face in a Plate! (Find here how to crochet the legs)

Vamos ahora con los dichosos tubitos a rayas que tantos dolores de cabeza os han dado. (Os quejáis de vicio). ¿Quieres que sean piernas? Pues piernas. ¿Que prefieres que sean brazos? Brazos, entonces. ¡Hola Caraplato! (Encuentra aquí cómo tejer las piernas)


Face on a Plate is a cute little fella born to be hung on a wall and make your day happier, because he's super nice. Hung him on a place that needs to be brightened up, like near the door, so it will be the last thing you see when you leave home, or by the bedside table so it will be the first thing you see when your alarm rings in the morning.

Caraplato es una cara en un plato para colgar en la pared y alegraros cada vez que lo miréis, porque es supersimpático. Ponedlo en un sitio que necesite un poco de alegría, como al lado de la puerta de casa para verlo cada vez que vayáis a salir, o en la pared sobre la mesita de noche para que sea lo primero que ves cuando suena tu despertador.


HOMEWORK:
1. Try all the thigs you've learnt to create different creatures on different surfaces.
2. Make a face on a Plate using an old plate with a flower pattern or such.
3. Crochet both arms and legs and introduce pipecleaners so you can move them and form different poses.
4. Try to make a Face on a Plate as a little bear or kitty.

This have been our first Cuteness Undercover, I really hope you've enjoyed it and you make the best of it. It's easy and beautiful, and there's nothing better than that. As soon as I come up with another super cute thing I'll let you know. Thank you so much for sharing all this crazy stuff with me!


EJERCICIOS:
1. Usa lo que has aprendido para crear diferentes muñecos en diferentes superfícies
2. Haz un Caraplato en un plato viejo estampado con flores u otros dibujos
3. Hazle brazos y piernas e introduce limpiapipas para poder darles movilidad.
4. Intenta crear un Caraplato que sea un osito o un gatito.

Hasta aquí nuestro primer Monerías Clandestinas. Espero que os haya gustado y os sirva para algo. Es fácil y bonito, nada mejor. En cuanto se me ocurra alguna otra monería volveré por aquí. ¡Gracias por acompañarme en mis historietas!

May 28, 2019

Cuteness Undercover "F.O.A.P", clue 4

Is it me or things are getting more and more interesting? Finally our clue #4 is here and because of that you all are going to hate me bad, I know that for sure. But everything comes with a price and designing cuties is a very risky business...

¿Me lo parece a mi, o esto se está poniendo interesante por momentos? Llegamos al fin a nuestra pista número 4.... pista gracias a la cual me vais a odiar, pero es un riesgo que hay que correr. Las monerías tienen su precio.


Yes, my poor innocents friends, it is a long and thin tube. I know that 99% of you are not fan of crocheting long and thin tubes, even worse if it involves constant colour changing. What I also know is that once it's finished you are gonna love it. So, please allow me a piece of advice here, from someone who has crocheted so many tubes that almost loves it (well, maybe not really love them, just accept them...):

1. They're actually very easy and quick to crochet, it won't take you more than 10 minutes each.
2. Keep track of the stitches while you crochet, count them, use the numbers as a way of meditation and try to enjoy that.
3. Once you finish them you'll feel that's totally worth it. Always. And that's what this is about.

Sí, mis pobres e inocentes amigas, se trata de un tubito fino y alargado. Se que el 99% de vosotras no sois muy fans de tejer tubitos alargados y finos, menos aún si incluyen frecuentes cambios de color. Lo que también se es que luego os encanta el resultado final. Así que, permitidme un consejo de alguien que ha tejido tantos tubitos largos y finos que ya hasta le ha pillado el gusto (bueno, el gusto tampoco, digamos que he aprendido a tolerarlos...):

1. Pensad que en realidad se teje superrápido, no vais a tardar más de 10 minutos en cada uno. 
2. Contad mientras lo tejéis, y concentraos en los números. Intentad disfrutar del estado de quasi-meditación que alcanzas al contar.
3. El resultado final merece siempre la pena, eso es lo más importante.


Even if you hate it bad, this kind of pieces are basic in the amigurumi technic. So, get it together and crochet as follows (twice, sorry about that):
1. Using blue cotton yarn, 5 sc in a magic ring
2. 5 inc (10 sc)
3. Using white cotton yarn, 10 sc
4. From now on you'll crochet 10 sc rounds, one in blue, one in white, till round 20.
20. 10 sc. Cut the yarn and fasten off.

Aunque la odiéis a muerte, es una pieza fundamental para tejer amigurumis. Así que armaos de valor y tejed lo siguiente (dos veces, lo siento):
1. Empezando con azul, 5 pb en anillo mágico.
2. 5 aum (10 pb)
3. Con blanco, 10 pb
4. A partir de ahora alternarás azul y blanco en cada fila. 10 pb hasta llegar a la fila 20.
20. 10 pb, corta y remata.


I'm just going to say one thing, well two. 1. This is reaching to an end and 2. prepare the silicone...

See you in two weeks! Use the hashtags!

Sólo os puedo decir una cosa, bueno dos. 1. Esto está llegando al final y 2. id preparando la silicona...

¡Nos vemos en dos semanas! ¡Usad los hashtags!

May 14, 2019

Cuteness Undercover "F.O.A.P", clue 3

Hi there, my dear anxious friends. I know I'm very cruel and I keep you waiting for ever but, come on, let's confess, you are working on minimum 5 more projects at the same time. So I'm sure that deep inside you're grateful things are a little chill around here. Am I right?

Hola, mis queridas amigas ansiosas. Se que os trato muy mal y os hago sufrir, pero bah, confesad, estáis tejiendo por lo menos 5 proyectos a la vez, así que en el fondo agradecéis que os haga esperar un poquito. ¿O no?


Our third piece is another cutie. A very helpful classic that will be perfect for many of your amigurumi projects. Again, we have to crochet it twice. Let´s go:
1. Using the brown cotton yarn, 6 sc in a magic ring
2. 6 inc (12 sc)
3. [1 sc, 1 inc] x6 (18 sc)
4. 18 sc
5. 18 sc
6. 18 sc
7. 18 sc
Cut the yarn and fasten off.

Nuestra tercera pieza es otra monería. Un clásico que os va a venir muy bien para vuestras propias creaciones amigurumi. En esta ocasión de nuevo tenéis que tejer dos iguales. Vamos allá:
1. Con marrón 6 pb en anillo mágico
2. 2. 6 aum (12 pb)
3. [1 pb, 1 aum] x6 (18 pb)
4. 18 pb
5. 18 pb
6. 18 pb
7. 18 pb
Corta el hilo y remata.


A little bit of crochet fitness, come on girls. You won't need more than 20 minutes. And I'll see you again in 2 weeks with another clue. Will you be able to wait? Do you have any idea of what are you crochetting? Write all your suspicions on the comments section. And remember to use our hashtags when posting any picture of the process!

Un poquito más de gimnasia ganchillera, vamos chicas. No tardáis más de 20 minutos. Y en un par de semanas nos vemos de nuevo. ¿Aguantaréis? ¿Tenéis alguna idea de lo que estáis tejiendo? Podéis contarme todas vuestras sospechas y elucubraciones en los comentarios. ¡Y recuerda usar nuestros hashtags para todas las fotos del proceso que compartas en redes!

April 30, 2019

Cuteness Undercover "F.O.A.P", clue 2

Here I am again, and this time we're going to reveal the second clue of this enigma. It hasn't been so hard, has it?

Ya estoy aquí de nuevo, con la segunda pista para nuestro enigma Monerías Clandestinas. No ha sido tan dura la espera, ¿verdad?


Second piece of this design for Cuteness Undercover is just one, so it's even easier than the last one.
1. Using the red cotton yarn, 6 sc in a magic ring
2. 6 inc (12 sc)
3. [1 sc, 1 inc] x6 (18 sc)
4. [2 sc, 1 inc] x6 (24 sc)
5. 24 sc
6. [2 sc, 1 decrease (dec)] x6 (18 sc)
Cut the yarn and fasten off.

Vamos con una nueva pieza. Esta vez es sólo una. ¡Más fácil aún! (Luego aún os quejaréis...)
1. Con rojo, 6 pb en anillo mágico
2. 6 aum (12 pb)
3. [1 pb, 1 aum] x6 (18 pb)
4. [2 pb, 1 aum] x6 (24 pb)
5. 24 pb
6. [2 pb, 1 disminución (dism)] x6 (18 pb)
Corta el hilo y remata.

I wonder what it could be... Any ideas or suggestions? See you soon with next clue! Don't forget to share your progress using our hashtags. Oh boy, this is exciting!

Me pregunto qué será... alguna idea o sugerencia? No olvides compartir tus progresos usando nuestros hashtags! Madre mía, esto es superemocionante.

April 16, 2019

Cuteness Undercover "F.O.A.P.", clue 1

Ready, steady, go!

¡Preparadas, listas....ya!


Here we have our first piece of the Cuteness Undercover and consists of:
1. Using the navy blue cotton yarn, 5 single crochet (sc) in a magic ring
2. 5 increases (inc) (10 sc)
3. Using white cotton yarn, [1 sc, 1 inc] x5 (15 sc)
4. [2 sc, 1 inc] x5 (20 sc)
5. 20 sc
Cut the yarn and fasten off. Repeat, you'll need two pieces.

Esta es la primera pieza de nuestra Monería Clandestina y consiste en:
1. Con azul marino, 5 puntos bajos (pb) en anillo mágico
2. 5 aumentos (aum) (10 pb)
3. Con blanco, [1 pb, 1 aum] x5 (15 pb)
4. [2 pb, 1 aum] x5 (20 pb)
5. 20 pb
Corta el hilo y remata. Repite todo otra vez, dos piezas en total.


And that's it! I told you it was going to be easy. Can you see what it is? Actually, it's not that difficult, isn't it?

See you in a couple of weeks with netxt clue!

¡Pues ya está! Os dije que iba a ser fácil. ¿Te imaginas lo que puede ser? Muy difícil no es...

Nos vemos la semana que viene con la siguiente pista!


November 21, 2018

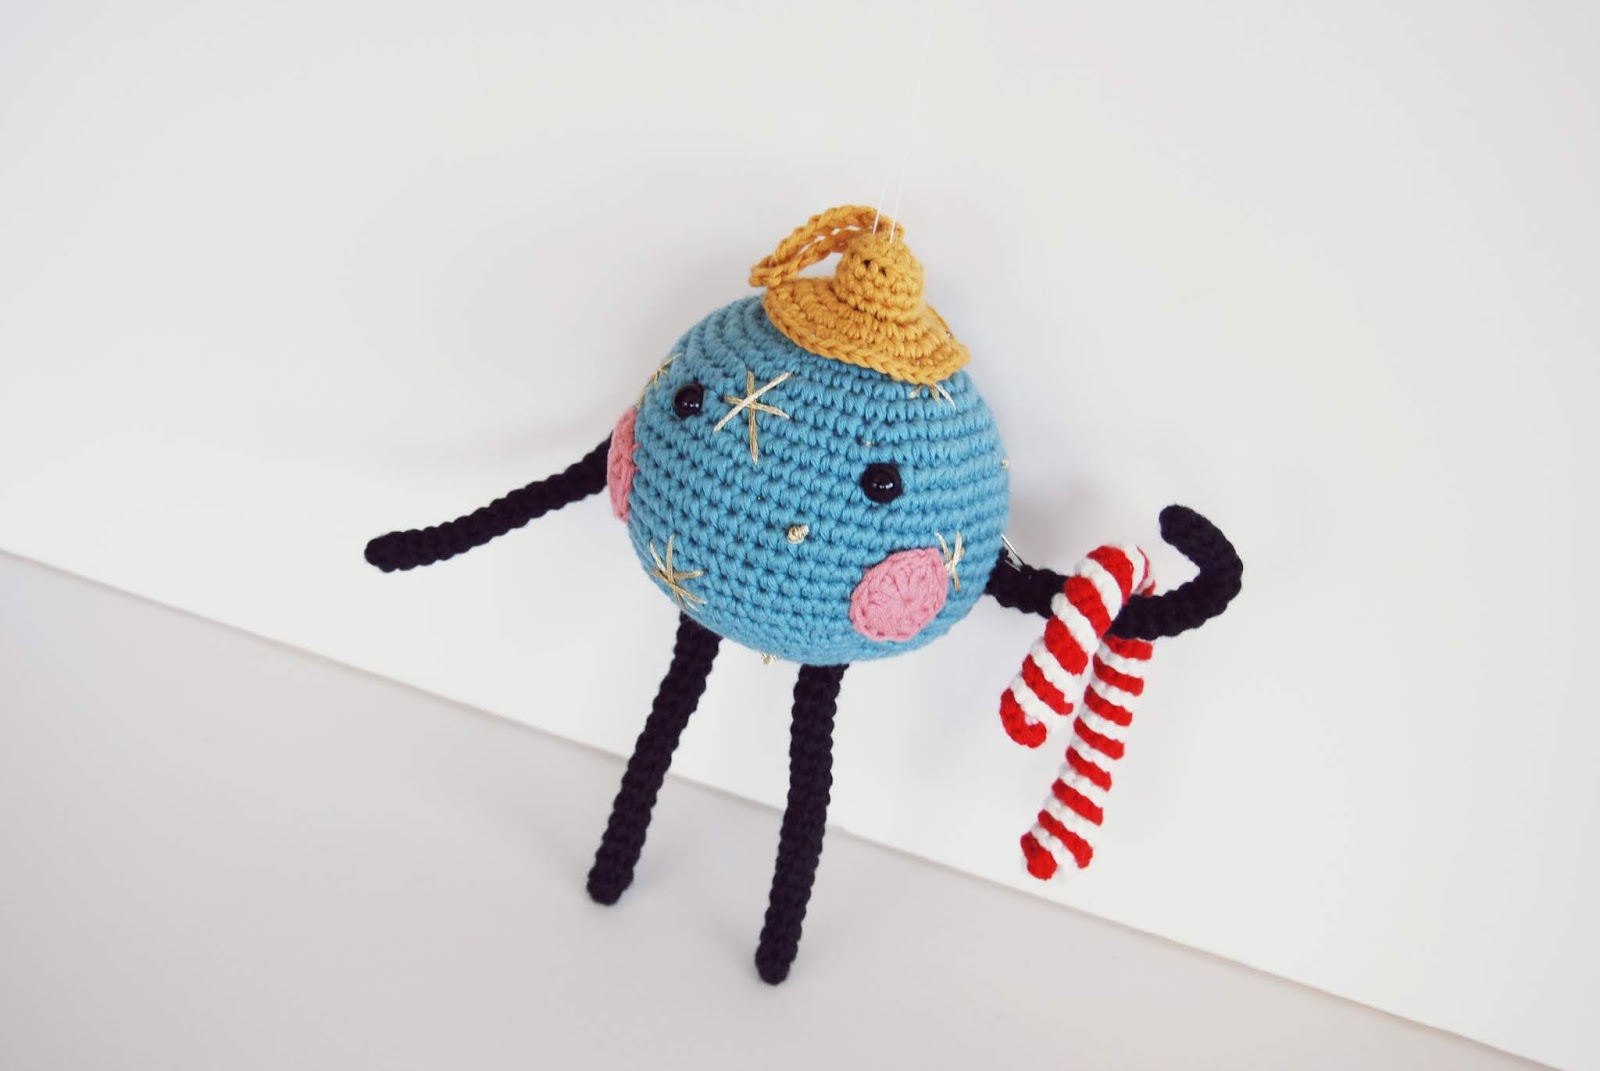
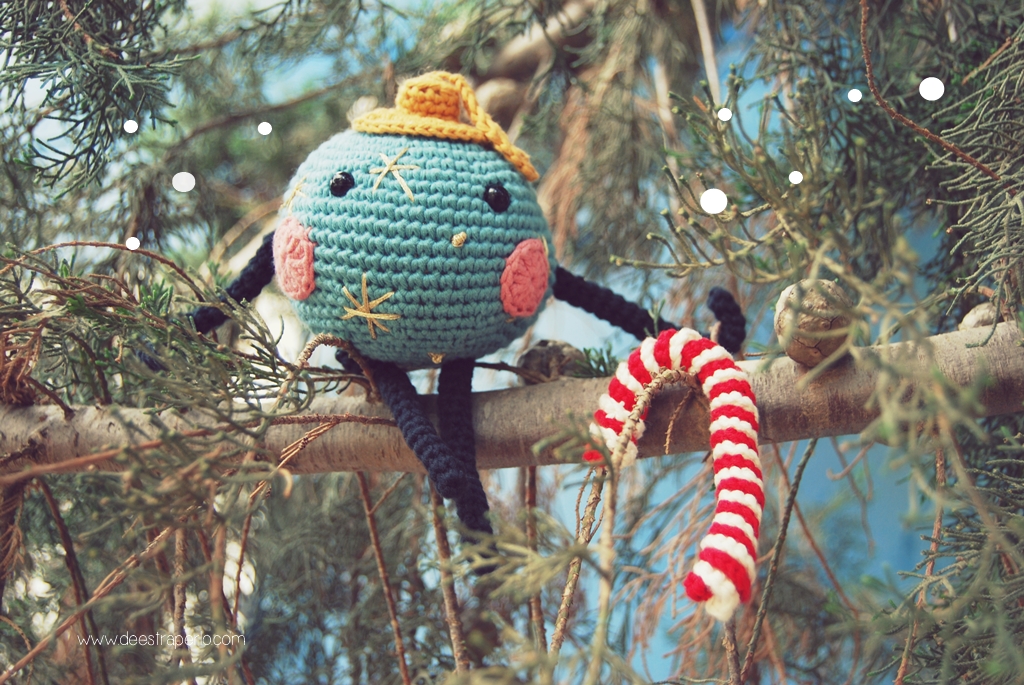
Bertie Christmas, the perfect dandy

Bertie Christmas: adorno de Navidad de día, petimetre de noche. 
Porque así es él, antes muerto que sencillo. Guapo y elegante las 24 horas del día.

En el fondo le entiendo. Cuando vives colgado en un árbol de Navidad, pasas mucho tiempo viendo tu reflejo en estrellas y otros brillantes adornos. Ahhh... cuánto placer... Y no puedes guardar eso para ti solo, compartir tu belleza con el resto del mundo es casi un deber, y estar guapo para los demás se convierte en una responsabilidad.

Y como Bertie es así de presumido, no le basta con pasearse por ahí con su sombrero y su bastón, si no que cuando se sacude produce un tintineo que inevitablemente acaba captando la atención de todos los presentes. 

Bertie es un muñeco perfecto para principiantes en amigurumi. Aprenderás todas las técnicas básicas como el anillo mágico, el aumento proporcional, aumentar y disminuir, tejer por delante y por detrás de la lazada, tejer en espiral o en círculos cerrados...

Además es rápido de tejer con lo que se convierte en una opción estupenda como regalo de Navidad. Téjelo en diferentes colores y prueba diferentes bordados, ¡cuanto más pruebes más te divertirás!


TEJER JUNTAS ES MEJOR
y más si es con BLUEBUBALÚ

No me canso de hacer regalos y dar buenas noticias, así que ahí va otra. Bertie ha sido creado especialmente para una colaboración con las hermanas más locas y divertidas del mundo lanático: Natalia y Patricia, las Blue Bubalú.

Hace tiempo que organizan CALs en su grupo de Facebook, muy variados, en los que se practican todo tipo de técnicas y estilos. Lo mejor: los retos y sus kits sorpresa. Bertie ya no es sorpresa, aún así puedes conseguir el KIT con todos los materiales para tejerlo en este enlace.


Hazte con tu kit, apúntate al grupo de Facebook, y... a tejer!!

  • Cotton yarn in red, black or dark brown for the legs and arms, pink, white, ocher and the color that you choose for the ball.
  • 2,5mm hook (B / 00 / 1 ½ EEUU)
  • A pair of 7 or 9 mm security eyes (0,3'')
  • Tapestry Needle
  • Scissors
  • Filling
  • Rattle
  • Pipecleaners (not for babies!)
  • Hilo de algodón en rojo, negro o marrón, rosa, blanco, ocre y el color que quieras usar para la bola. 
  • Hilo de bordar dorado para los detalles.
  • Ganchillo de 2,5mm (B / 00 / 1 ½ EEUU)
  • 2 ojos de seguridad de 7 or 9 mm (0,3'')
  • Aguja lanera
  • Tijeras
  • Relleno sintético
  • Cascabel para sonajeros
  • Limpiapipas para brazos, piernas y bastón . (NO recomendable para bebés.)

ABBREVIATIONS

ch- chain
dc- double crochet
sc – single crochet
rd - round
sl st- slip stitch
st – stitch
x – times
ABREVIATURAS

cad- cadeneta
pa- punto alto
pb - punto bajo
pt – punto
vta - vuelta
x – repeticiones


HOW TO READ THE PATTERN

I'll begin by telling you which piece to crochet and the color you have to use.
Then I'll continue with the number of the row + the stitches to work in that round + the
total amount of stitches in that round in parentheses ( ).
Repeat the instructions in the [ ] brackets as many times as the X number tells you.

CÓMO LEER EL PATRÓN

Primero te diré la pieza y el color.
Después viene el número de la vuelta + los puntos para trabajar en esa vuelta + el número total de puntos de la vuelta entre paréntesis ( ).
Repite las instrucciones entre corchetes [ ] tantas veces como te indique la X.


THE PATTERN
You'll work always in the round, (you can choose joining or working in spiral), except on the Candy Cane.

EL PATRÓN
Se trabaja siempre en redondo, (tú eliges si prefieres trabajar en espiral o en vueltas cerradas) , excepto el bastón de caramelo.


CHEEKS (make 2)
1. Using pink cotton thread, chain 3 (count as a dc), 11 dc in a magic ring (12 dc)

MOFLETES (haz 2)
1. Con rosa y trabajando en un anillo mágico, 3 cad (equivalen a  un pa), 11 pa (12 pa)


BODY

1. Using the color chosen for the ball, 6 sc in a magic ring
2.6 inc(12 sc)
3. [1 sc, 1 inc, ] x6 (18 sc)
4. 1 sc, 1 inc, [2 sc, 1 inc] x5, 1 sc(24 sc)
5. [3 sc, 1 inc] x6 (30 sc)
6. 2 sc, 1 inc, [4 sc, 1 inc] x5, 2 sc(30 sc)
7. [5 sc, 1 inc] x6 (42 sc)
8. 3 sc, 1 inc, [6 sc, 1 inc] x5, 3 sc(36 sc)
9. [7 sc, 1 inc] x6 (54 sc)
10. 4 sc, 1 inc, [8 sc, 1 inc] x5, 4 sc (60 sc)
(You'll place the eyes here later)
11 to 18. 60 sc
19. 4 sc, 1 dec, [8 sc, 1 dec] x5, 4 sc (54 sc)
20. [7 sc, 1 dec] x6 (48 sc)
21. 3 sc, 1 dec, [6 sc, 1 dec] x5, 3 sc (42 sc)
22. [5 sc, 1 dec] x6 (36 sc)
23. 2 sc, 1 dec, [4 sc, 1 dec] x5, 2 scc(36 sc)
24. [3 sc, 1 dec] x6 (30 sc)
Place the eyes leaving 11 stitches between them, attach the cheeks and embroider the rest of the details. You can use the picture as a reference.
Stuff the ball and place the rattle among the stuffing.
25. 1 sc, 1 dec, [2 sc, 1 dec] x5, 1 sc (24 sc)
26. [1 sc, 1 dec, ] x6 (12 sc)
27. 6 dec
Cut the yarn and fasten off
CUERPO

1. Con el color de la bola, 6 pb en anillo mágico.
2.6 aum (12 pb)
3. [1 pb, 1 aum, ] x6 (18 pb)
4. 1 pb, 1 aum, [2 pb, 1 aum] x5, 1 pb (24 pb)
5. [3 pb, 1 aum] x6 (30 pb)
6. 2 pb, 1 aum, [4 pb, 1 aum] x5, 2 pb (36 pb)
7. [5 pb, 1 aum] x6 (42 pb)
8. 3 pb, 1 aum, [6 pb, 1 aum] x5, 3 pb (48 pb)
9. [7 pb, 1 aum] x6 (54 pb)
10. 4 pb, 1 aum, [8 pb, 1 aum] x5, 4 pb (60 pb)
(Aquí colocarás los ojos más adelante)
11 a 18. 60 pb
19. 4 pb, 1 dism, [8 pb, 1 dism] x5, 4 pb (54 pb)
20. [7 pb, 1 dism] x6 (48 pb)
21. 3 pb, 1 dism, [6 pb, 1 dism] x5, 3 pb (42 pb)
22. [5 pb, 1 dism] x6 (36 pb)
23. 2 pb, 1 dism, [4 pb, 1 dism] x5, 2 pb (30 pb)
24. [3 pb, 1 dism] x6 (24 pb)
Coloca los ojos dejando 11 puntos de separación, cose los mofletes, borda el resto de detalles. Puedes seguir las fotos como referencia para tus bordados.
Rellena la bola e introduce el cascabel en medio.
25. 1 pb, 1 dism, [2 pb, 1 dism] x5, 1 pb (18 pb)
26. [1 pb, 1 dism, ] x6 (12 pb)
27. 6 dism 
Corta el hilo y remata.


HAT

Bertie is a classy guy, that's why he always wears his hat. This way he can pay his respects to everybody he runs into and hung on the tree whenever he feels like it. He loves to dance while hunging on the Christams tree...

1. Using ocher cotton yarn, 6 sc in a magic ring
2. 6 inc (12 sc)
3. 12 sc in BL
4 and 5. 12 sc
6. 12 inc in FL (24 sc)
7. [1 sc, 1 inc] x12 (36 sc)
8. 36 sc
Cut the yarn and fasten off.
String
Using ocher cotton yarn, chain 20 and attacht it to the center of the magic ring in round 1.

SOMBRERO

Bertie es un tipo con clase, de los que ya no quedan. Rara vez le verás sin su sombrero el cual utiliza, además de para saludar a todo aquel con quien se cruza, para colgarse del árbol cuando le apetece. Le encanta bailar mientras está colgado del árbol...

1. Con ocre, 6 pb en anillo mágico.
2. 6 aum (12 pb)
3. 12 pb en BL
4 y 5. 12 pb
6. 12 aum en FL (24 pb)
7. [1 pb, 1 aum] x12 (36 pb)
8. 36 pb
Corta el hilo y remata.
Cuerdecita
Con ocre teje 20 cad y únelas al centro del anillo mágico de la vta 1.


LEGS AND ARMS (make 4)

1. Using black or brown cotton yarn, 6 sc in a magic ring
2 to 24. 6 sc
Place the pipecleaners, no need to stuff.
Cut the yarn leaving a long thread to attach it to the ball later.

EXTREMIDADES (haz 4)

1. Con negro o marrón, 6 pb en anillo mágico.
3 a 24. 6 pb
Introduce el limpiapipas, no es necesario rellenar.
Corta dejando hilo suficiente para unirlo a la bola.


CANDY CANE

We're going to use a very fun and easy technic to create crochet curls. In this case we're using it to create the spiral effect of the cane, but you can use it to make some other special effects to your amigurumis, for example nice cute ringlets for a doll. 
You'll find several tutorials in the internet, here you have a video by  Crochet Geek which I find very easy to follow.

1. Using white cotton yarn, chain 50
2. 3 sc in each chain
Cut the thread and fasten off.
Do the same with the red cotton yarn.
Roll both spirals together among them and then over the pipecleaner
Shape it like a cane.

BASTÓN DE CARAMELO

Para el bastón vamos a trabajar una técnica divertidísima y super sencillo para crear tirabuzones. En este caso lo usaremos para hacer el bastón, pero puedes usarlo para conseguir muchos otros efectos especiales en tus amigurumis.
Encontrarás muchos tutoriales en internet, te voy a enlazar a este vídeo de Crochet Geek que, aunque está en inglés, está muy bien explicado y te será de gran ayuda.

1. Con blanco, 50 cad
2. 3 pb en cada cad
Corta el hilo y remata.
Haz lo mismo en rojo.
Enrolla la espiral roja con la blanca entre si.
Enrolla las espirales en el limpiapipas.
Moldea para dar forma de bastón


Y SI TE HAS QUEDADO CON GANAS DE MÁS AMIGURUMIS NAVIDEÑOS, AHÍ TE DEJO UNOS CUANTOS.

Related Posts Plugin for WordPress, Blogger...